Virtualization with VirtualBox – Part 1
For me virtualization is a very common term. Event for a web developer! The problem is, that without knowing something about virtualization it is nearly impossible to offer your work widespread.
There are many different solutions for virtualization. Some of them are also free to use:
- VirtualBox
VirtualBox from Oracle is open source and for me one of the best solutions. VirtualBox is available for every operating system. - VMWare Server 2
VMWare server is not supported any more and so it is free to download. I have experimented a bit with this, but for me this is not ideal and it turns out that is yet a little bit buggy. - KVM
This is a virtualization technique that runs on Linux. I have never configured it but I have seen it in action because my hoster uses KVM. So I think it can be used on a business level.
I am using VirtualBox. It is easy to install and to use. I can also recommend it because there are updates nearly every month. This indicates that the software is under development and gets better, faster and more features.
Introduction
First I need to explain two very important terms:
- Host system
The host system is the operation of your machine where you install VirtualBox. For my MacBook Pro this is currently OSX 10.8.2. - Guest system
The guest system is the operating system your want to install with VirtualBox and runs on top of your host system. For me this is for example Windows XP, Windows 7 or different types of Linux.
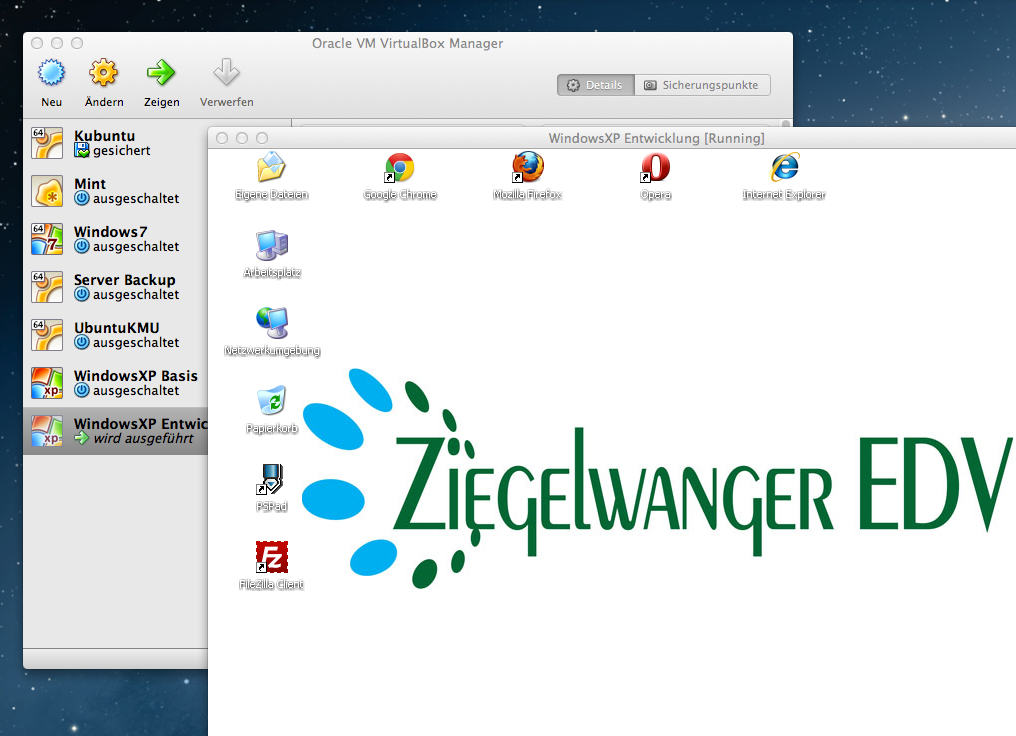
As you can see on this picture, I use Windows XP in a window on my OSX.
Installation
After your download of Virtualbox it is easy to install it on the host system. Only step through the installer. If you are using Linux as host, the installation depends on your distribution. There are distributions where Virtualbox is in the packet manager or already installed (for example Mint). If you can not find Virtualbox on your Linux, you can get it from their homepage.
When you start Virtualbox, you get the VirtualBox manager. There you can manage all your virtual machines. On the picture you can see this manager with some installed machines. You can create a new one with the button ’new‘. After you clicked that button a wizard appears that step you through the installing process:
- VM-Name and OS-Typ
The first thing you have to decide is the name of your machine and the type of operating system. For the type you can choose from many pre defined configurations for operating systems and different versions. It is important to run your machine with the correct settings. The most important thing here is the difference between 32bit and 64bit machines. - Memory
Now you have to decide how many memory your machine is allowed to use. For this you have to consider that your host system and your guest system needs to share your RAM. You can tweak here to get maximum performance for both. The wizard chooses the minimum afford for the chosen guest operating system. For some needs (for example if you want to run programs on your virtual machine that needs a lot of memory) you have to higher the memory. You can change this every time before you boot the virtual machine. - Virtual HD
Each system needs a storage from where it can be booted. You can define that the system is booted from a virtual cd, but normally you will want to install your operating system onto disk. For this you can create a virtual hard disk. This is only a large file for your host system. The type of virtual disks is not so important (I only use VDI). It can be important, if you want to use that disk also for other virtualization programs. - Type of HD
There are two different types: ‚dynamically allocated‘ or ‚fixed size‘. Dynamically allocated means, that the virtual hard disk file on your host system is as large as the amount of used space for this disk. So this file is increasing, but remember: it can only get as big as defined as maximum size. Fixed size means, that the disk file on the host system is for a 10 GB disk 10 GB big. For me this is the better solution. - Storage place and size
Now you have to find a place for the virtual hard disk on the file system of your host system. For this I have defined a partition only for those files, because so I can make backups of all my systems by a backup of only one partition. The other thing you have to choose is the size of the virtual disk. The wizard also sets a minimum requirement. Remember that you can not change the size afterwards.
Now the configuration of your virtual machine is finished. You have just created a new computer without an operating system. The only difference to a real hardware computer is, that it is optimized for one special operating system.
The last step is to start the new machine. Normally you get a dialog box at the first boot where you can define a bootable medium. This can be your CD or DVD drive or also a virtual CD drive (for example an *.iso file).
Part 2 is about configuring you new installed system.


