My perfect server – Part 4
This part of my article series about my perfect server is about how to administrate Virtual Box without direct SSH or VNC connection to the server and without the need to plug in a display, mouse and keyboard. This method is interesting, because it can be done event for not administrators and so the running guest systems can be administrated from someone else without the need to get server access. A user can start or stop guest systems, log into them or even install new ones. For this we only need phpVirtualBox, a web front end for Virtual Box.
phpVirtualBox
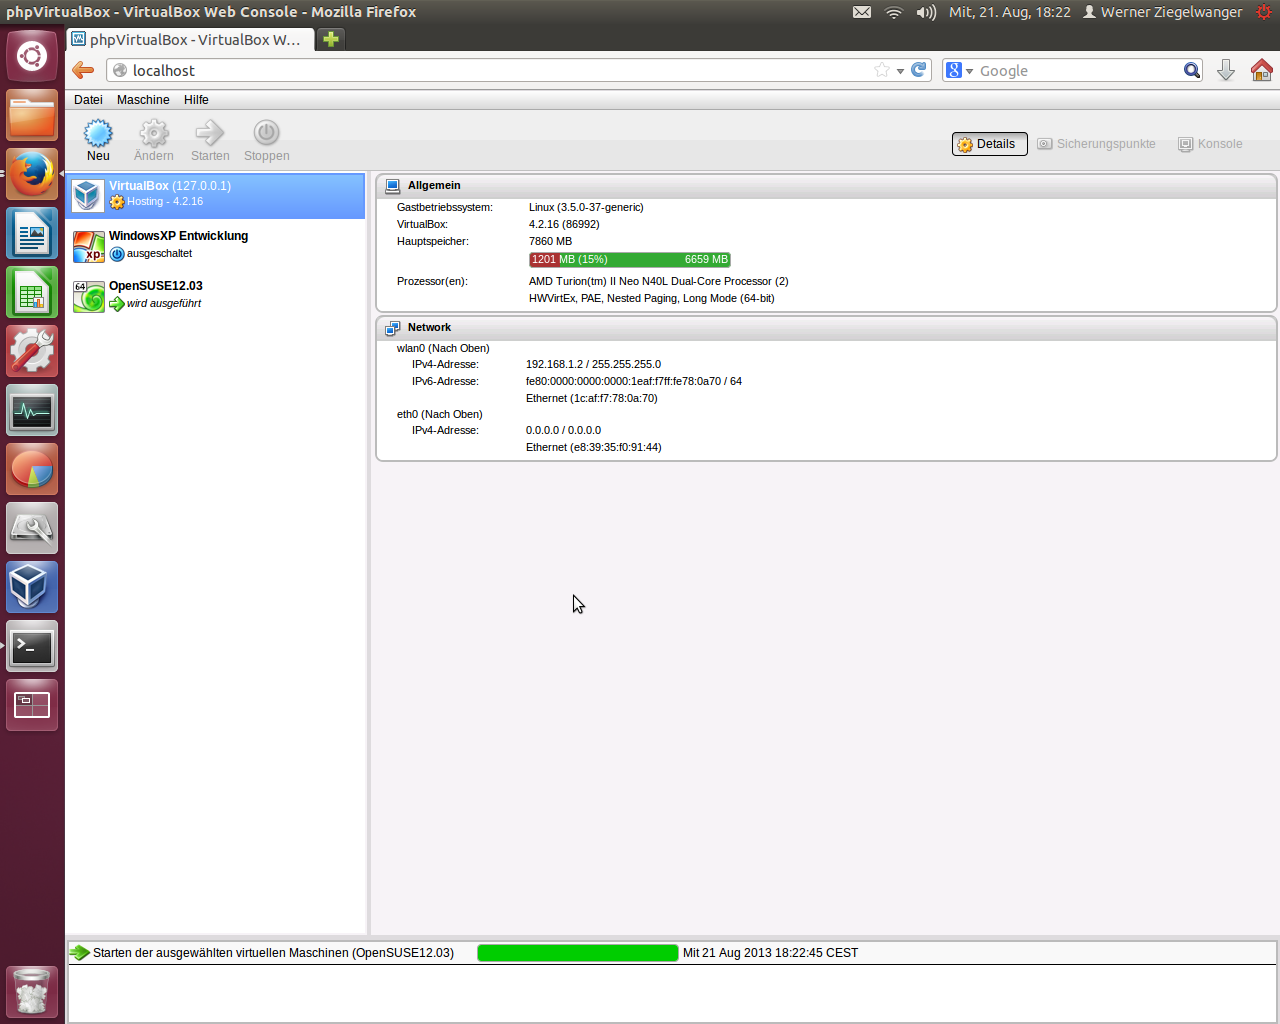
phpVirtualBox is a web application that uses nearly the same interface as your known desktop version of Virtual Box. It has the same options and functions so you can use Virtual Box completely over the web interface. You can even create new machines. The web front end also supports a resource monitor to inform you about the host system. You have all necessary information that you can run as much guest systems as your host allows.
For each running system you also get a RDP connection. With it you can get the desktop or terminal from the running guest system and can work online.
Preparations
For phpVirtualBox you will need a running web server. You should install apache2 and also php5. A good idea is to install a complete LAMP server environment:
sudo apt-get install lamp-server^
For phpVirtualBox we will create a new user:
adduser virtualbox
And this user will get rights for Virtual Box. For this we will add the user to vboxusers group which was created during Virtual Box installation:
adduser virtualbox vboxusers
Installation
Installation of phpVirtualBox is easy. phpVirtualBox is a PHP web application. We only need to get the source from Sourceforge and copy the directory to our apache web directory, normally /var/www. I copied the whole code directly into my /var/www directory without any root directory of the web application. With this, I will get the application by simply writing localhost into my browser textfield. On my system, phpVirtualBox will be the only web application. If you copy the source into /var/www/phpVirtualBox, then you will call it with localhost/phpVirtualBox from your browser.
Configuration
Configuration of phpVirtualBox is a bit harder. I got many problems, because I found a tutorial for version 4.1. Apparently there were many changes since the last update. First we start by creating a new config file for our phpVirtualBox. You will find it at your root directory of phpVirtualBox. There you should find a config.php-example file. We will copy this file and open it with an editor:
mv config.php-example config.php
nano config.php
At this file, we need to set data for our new user. You should set username and password. The part of the configuration file should look as follows:
/* Username / Password for system user that runs VirtualBox */
var $username = 'virtualbox';
var $password = 'blablaneuespasswort';
Replace this password with your password. It should be typed as clear text. I hope everyone knows now, why we created a new user for this.
Next, we need to configure Virtual Box service so that the user can use it:
nano /etc/default/virtualbox
At the end of the file you should add the following line:
VBOXWEB_USER=virtualbox
After a restart, everything should work. On your web front end of phpVirtualBox you should log in with:
username: admin
password: admin


